Saturday, January 22, 2011

Bread Machine Bread


My brother-in-law gave me a bread machine for Christmas and I LOVE IT!! I have made 4 loaves of bread since I've gotten it and they all turned out great. This is the first recipe that I made and I think it turned out nicely. From what I've read it is very different from most bread recipes because you combine the yeast with the water instead of making sure the yeast doesn't touch the wet ingredients. Turned out just fine for me!

The second and third times I made this recipe I added some seasonings to the dough: minced garlic, garlic powder, basil, pepper etc. Then once it was about to start baking I brushed on a garlic/butter glaze. Yum! I thought I could have added more seasonings so once I get the amount right I will post them but I LOVED the garlic butter glaze. Very yummy!!

Ingredients:
1 cup warm water (make sure it's pretty hot, so it will dissolve the yeast)
2 tablespoons white sugar
1 (.25 ounce) package bread machine yeast
1/4 cup vegetable oil
3 cups bread flour
1.5 teaspoons salt

Directions:

Place the water, sugar and yeast in the pan of the bread machine.

This is the yeast I bought. You use one whole packet.


Let the yeast dissolve and foam for 10 minutes.

This is what mine looked like after 10 minutes.


Add the oil, flour and salt to the yeast.
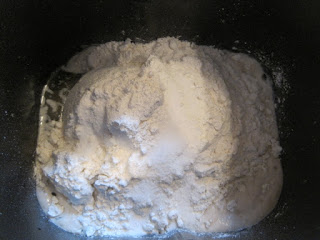


Select Basic or White Bread setting, and press Start. Depending on your bread machine you may have other selections like how dark you want the bread to be, size etc. I pressed 1.5 pound loaf and I like my bread cooked light or medium. Once you press start the bread machine does the rest for you! Enjoy!

Sunday, January 16, 2011

Christmas Cookies


If you have children, these are very fun cookies to make with them during Christmas. I am a little bummed that I did not get a photo of them finished with the icing. Once they were decorated I put them on top of each other to store them. They all got stuck together - which was fine for eating, not so fine for picture taking. :( If you make these definitely do not store them on top of each other unless you have put some parchment/wax paper in between the layers first. After you bake these cookies and they cool you can decorate them more with white icing. I found this recipe on Pioneer Woman's cooking site. You can check out what they would look like iced by clicking here.

Ingredients:
COOKIES:
2/3 cups Shortening
3/4 cups Sugar
1/2 teaspoons Grated Orange Or Lemon Zest (I have made these cookies twice and prefer the lemon zest over the orange)
1/2 teaspoons Vanilla
1 whole Egg
4 teaspoons Milk
2 cups Flour
1 1/2 teaspoon Baking Powder
1/4 teaspoons Salt

EGG YOLK GLAZE:
1 whole Egg Yolk
1 teaspoon Water
2 drops (to 3) Food Coloring

WHITE DECORATIVE ICING:
1 bag 2 Lb Powdered Sugar
1/4 cups Milk
2 Tablespoons Egg White (optional and I left this out)

Directions:
Cream shortening, sugar, lemon zest, and vanilla thoroughly. Add in egg and beat until light and fluffy. Add in the milk and mix.

Sift dry ingredients together, then blend into cream mixture. Divide dough in half, slightly flatten between two sheets of waxed paper, then refrigerate for one hour (or freeze for 20 minutes).

While dough is chilling, combine egg yolk, water and food coloring to make the egg yolk glaze.


We made purple, red, blue and green but you can make whatever colors you like.

Roll out dough on lightly floured surface and cut into shapes with a cookie cutters. Transfer shapes to lightly greased cookie sheet and paint cookies (with a soft brush) with egg yolk glaze.


This is such a fun baking project for kids! I think you could make these for any holiday. Valentine's Day, Easter - or just any time you want to make sugar cookies.


After brushing with egg yolk glaze, bake at 375 degrees for approximately 6 minutes. Do not allow the cookies to brown. You only want them to puff up. 6 minutes was perfect for my cookies.

While cookies are baking, mix powdered sugar, milk and egg whites (which are optional) to make the decorative icing. Remove cookies from oven to a wire rack to cool. Then, using a pastry bag or Ziploc bag, pipe with white icing to decorate.

Note: when making the white decorative icing, make sure that it is thick and somewhat retains its shape.

Sunday, January 9, 2011

Chicken Breast Supreme


I made this recipe a while back but never took photos of it. We had friends over for dinner last weekend and I decided to make this and try to remember to take pictures! I found the recipe on Kelly's Recipes food blog. It was a very easy recipe and quick to throw together. The only thing to keep in mind if you decide to make this is that it needs to bake in the oven for 1 hour and 30 minutes.

Ingredients:

4 chicken breasts
8 strips of bacon
16 oz sour cream
1 can of cream of mushroom soup
1 can of sliced mushrooms
1 jar of dried beef (this is found near tuna or spam)

Directions:
Preheat the oven to 350 degrees.

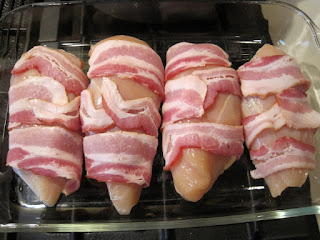
Wrap each chicken breast with two pieces of bacon. Place chicken in a 9x13 baking dish.


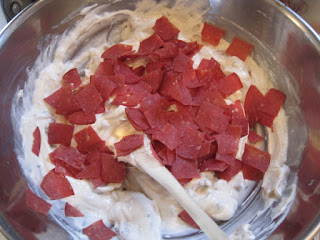
Combine sour cream, soup and sliced mushrooms. Tear up the dried beef and stir into the soup mixture.


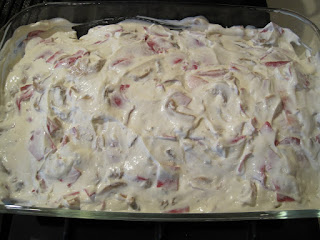
Cover the chicken breasts with the soup/beef mixture and bake in oven for 1 hour and 30 minutes.


I did end up forgetting to take pictures that night of this dish. Thankfully we had 2 pieces left over so I was able to get a photo of it from our leftovers! I actually thought it tasted better as a leftover - the flavors were much more prominent in the chicken.

Enjoy!